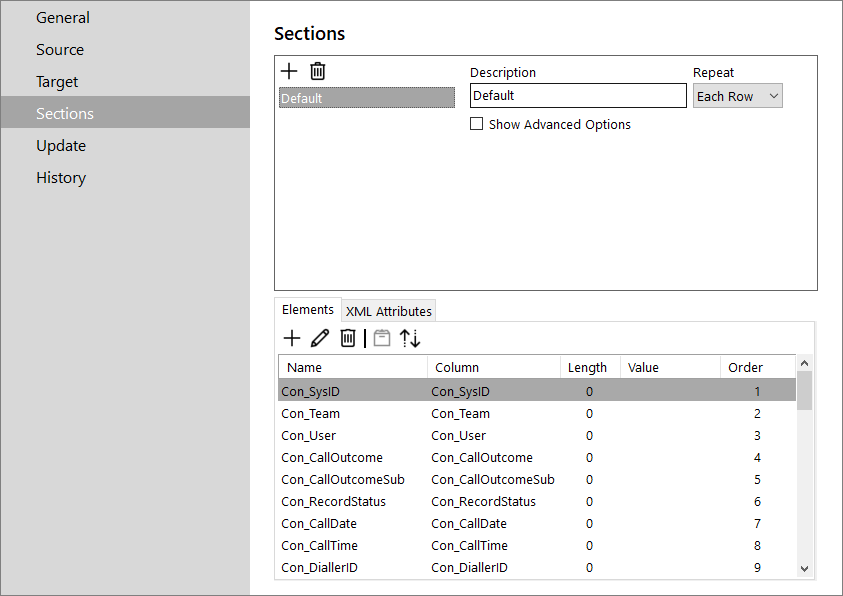
Sections tab
Exports can have multiple sections; usually configured as a header (one row), the main export body (multiple rows), and a footer (one row). Most of the time however, they will probably consist of the main export body only.
|
Example: A typical export fixed width export with a header, main and footer section might look like this:
|
|
Example: A delimited export with no header or footer but just a main section would be:
|
The 'Sections' tab consists of two panels.
Section panel
The following settings are available:
- Description: Descriptive name for this section – used in the section list
- Repeat: Specifies whether this section is a Header, Main, or Footer section (if the export does not require a header or footer but just the main export body, set this to Each Row).
- Show Advanced Options (checkbox): Checking this displays additionally the following options:
- Grouping: The column in the table that this section should be grouped by (can be left blank if no group is required).
- Order: The ordinal position of this section in the case of multiple sections (can be left as zero in the case of an ‘Each Row’ export).
- XML Section Name: The name to be used for this section in XML exports (can be left blank if not doing an XML export).
- Condition: The column to be used in a row condition (for building up a query to filter the data). It can be left blank if no condition is required.
- Condition Value: The value that Condition Column should equal to qualify for this export (can be left blank if no condition is required).
The following actions are also available in the panel's toolbar for managing sections:
| Icon | Description |
|---|---|
|
|
To add a new settings section |
|
|
To delete a settings section |
Element panel
For each section, the actual items to be exported need to be specified. These are known as Elements in Infinity.
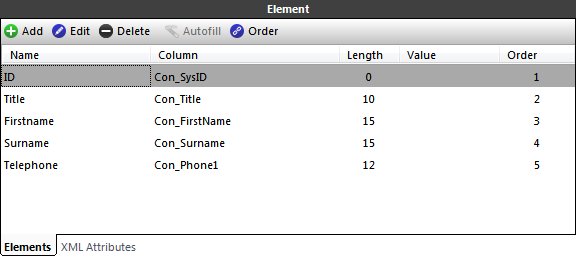
Elements can be added, edited or removed using the appropriate icons on the toolbar of the panel:
| Icon | Description |
|---|---|
|
|
Allows you to add a new element to the export section.
Provide the required options and then click the |
|
|
Allows you to modify the element's options. Click the |
|
|
Removes the selected element from the export section. |
|
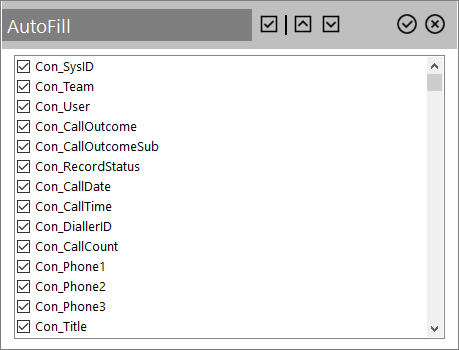
|
It can be used to automatically fill the Element based on selected columns from the Source table.
Select the checkboxes for the required columns or the 'All' checkbox on the top of the pop-up window to select all columns. Click the |
|
|
Use the arrows to the right to change the order of the elements on the list. |
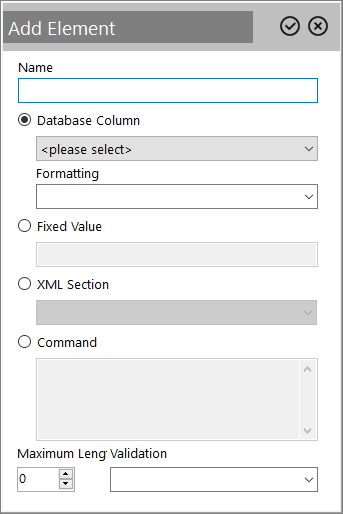
For each element the following options exist:
- Name: The name of the element that will be used as the field header in the generated file
- Export type: You can select one of the following radio buttons:
- Database Column: The column from the Source table that should be exported.
- Formatting: The formatting to be applied to the selected database column.
- Fixed Value: Sometimes, a column is required in an export that does not come directly from a table but may be a fixed text value which can be specified here.
- XML Section: The XML section to be exported, if doing an XML export.
Command: An pseudo-SQL User-Defined Function (UDF) that generates the value to be exported. It can be a raw SQL statement.
Example: “CASE WHEN Con_CallOutcome= '1' THEN 'Sale' ELSE 'Unknown' END”
- Database Column: The column from the Source table that should be exported.
- Maximum Length: The maximum length of this element in the export. Usually only required to be specified for Fixed-Length exports.
- Validation: Simple validation can be performed by selecting one of the validation functions from this list. If the element fails this validation, it will not be output. Applies to XML exports only.
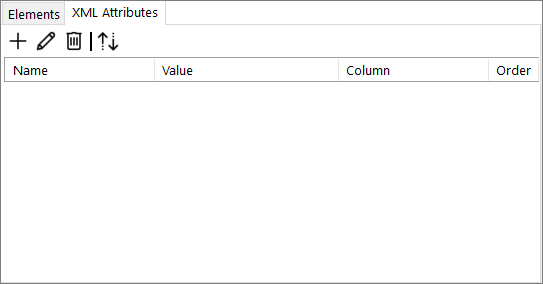
An XML attribute is a value that is associated with a section.
Example: <Section1 attribute1="abc" attribute2="123">
</Section1>
The following actions are available through the toolbar:
|
Icon |
Description |
|---|---|
|
|
Allows you to add a new XML attribute to the export section.
Provide the required options and then click the |
|
|
Allows you to modify the XML attribute's options. Click the |
|
|
Removes the selected XML attribute from the export section. |
|
|
Use the arrows to the right to change the order of the XML attributes on the list. |
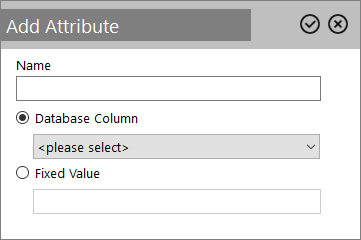
For each XML attribute the following options exist:
- Name: The name of the attribute
- Export value: You can select one of the following radio buttons:
- Database Column: The column from the Source table that should be exported.
- Fixed Value: Sometimes, a column is required in an export that does not come directly from a table but may be a fixed text value which can be specified here, i.e. XMLDATA.