Inbound Script - WebService
In this tutorial we are going to use a WebService control to validate the customer credit card details, returning the card type, expected length and validity status.
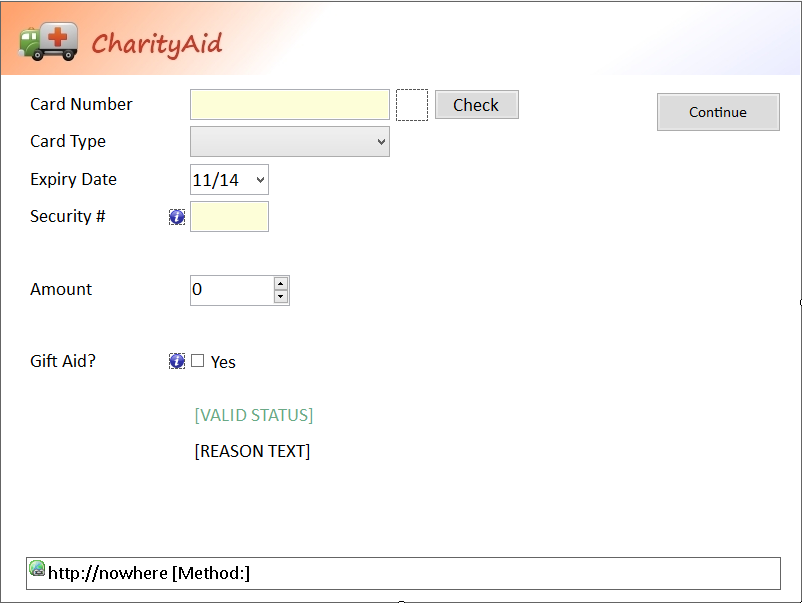
In order for this new functionality to work we need to add new controls to the screen. We will make the following changes to the Credit card screen:
- Change the card type ComboBox for a TextBox control
- Add a Button labelled "Check" to perform the card lookup
- Add a WebService control to the screen
- Add 2 Labels to the screen
- To be used to hold the validity status and any error message returned explaining why the number is not valid.
- These controls should be marked as not visible.
- Add an Image control but do not assign an image.
Once done the screen should look similar to
The WebService control allows you to make use of either internal or external webservices. To use the control right-click it and select “Properties”

You need to provide the address to the webservice in the TextBox labelled “Webservice Address” and the press the ellipsis button in tab 'Webservice Control'. This will attempt to connect to the web service specified and identify the actions that you can call. If it finds any available actions they will be listed in the “Select Webservice Method” drop-down list.
Example:
For a working example we are going to connect to http://infinity-01.infinityccs.com/validation/Service.asmx and then select the “ValidateCreditCard” method.
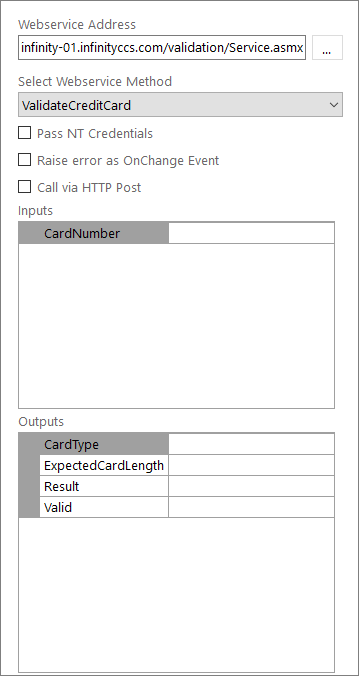
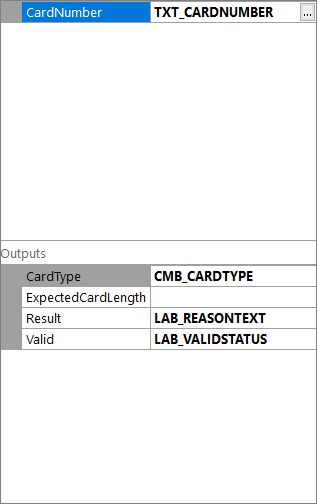
By selecting a method the properties control will update to show the parameters you need to provide, and the response data that you will get back. These need to be mapped to Controls, Database Fields, Variables, Fixed Text or left blank if the parameter is not required. For this example we will map up the controls as follows:
Once the WebService control has been configured we need to call it in order to get data back. Right-click the “Check” button and select “Add Function” to open the function builder.
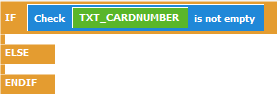
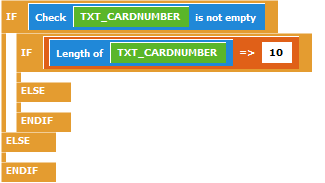
To reduce the number of calls made to the web service we are going to do some basic checks on the card number TextBox. The first of these is to ensure there is a number in the TextBox. Drop an IF..ELSE block onto the function panel from the “Conditions” group. From the “Functions” group select “Check [ ] is not empty” and drop it into the IF parameter.
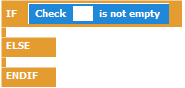
In to the parameter we need to drop the credit card TextBox control.
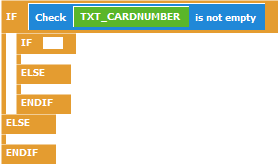
The second check we are going to do is ensure the agent has typed in at least 10 characters of the card number. To do this drop another IF..ELSE block into the top half of the current IF block.
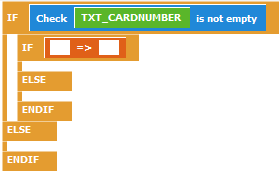
From the “Operators” group select the ”[ ] ⇒ [ ]” command and drop into the new IF block.
For the first parameter of the ”[ ] ⇒ [ ]” command we are going to get the length of text entered into credit card TextBox, using the “Length of [ ]” command from the “Functions” group.
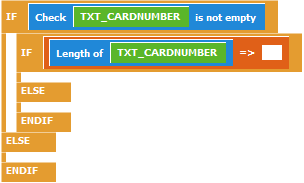
For the second parameter we are going to specify the minimum length we are checking for, in this case 10. Click the second parameter and type in 10.
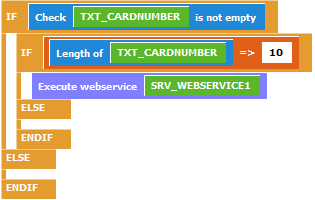
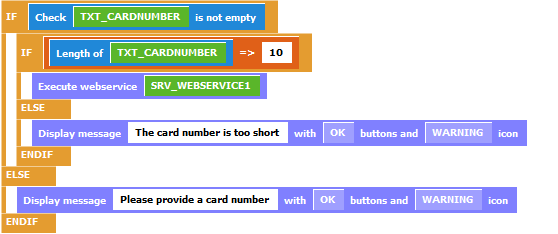
If credit card TextBox contains at least 10 characters then we are OK to call the web service, which we do using the “Execute webservice [ ]” command from the “Control” group.
All that remains to is to use some “Display message [ ] with [ ] buttons and [ ] icon” commands to warn the user they have not provided the correct card number information.
Once the web service has been called any screen controls bound to output properties of the web service will be updated. You can also assign a function to the web service control that will be run once it returns with data.
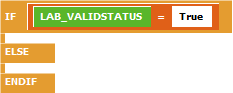
We are going to use this function to update the screen to indicate whether or not the card number entered is valid. To do this right-click the web service control and select “Add Function” to open the function builder. We are going to update the screen depending on the state of the “Valid” property returned by the web service, we have assigned this property to the status Label control.
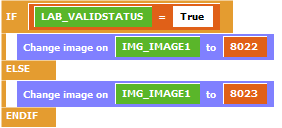
The first change we will make to the screen is to change the Image to show a tick or a cross. This is done using the “Change image on [ ] to [ ]” command from the “Control” group. Into the first parameter we will drop in the Image control. For the second parameter we need to add the ID of the Image to be shown.
|
Note: Click the parameter and the image picker will be displayed allowing you to select the images you wish to show. |
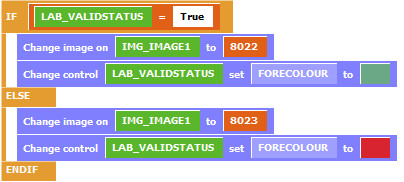
The next change will be to the text colour of the status Label, so it is green if valid and red if invalid. This is done using the “Change control [ ] set [ ] to [ ]” command from the “Control” group.
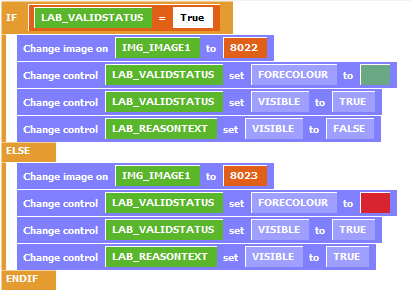
Finally we need to show the Labels on screen so the agent can see them. If the card number is valid the reason Label will remain hidden. This is done using the “Change control [ ] set [ ] to [ ]” command from the “Control” group.
If you wish to test the web service here are some test card numbers.
| Card Type | Number |
|---|---|
| Solo | 633473060000000000 |
| Visa | 4444333322221111 |
| Switch | 5641820000000005 |
| Mastercard | 5404000000000001 |
| American Express | 340000000000009 |
| JCB | 3566002020360505 |
| Visa Delta | 4462000000000003 |
| Electron | 4917300000000008 |
Inbound Script - Webservice review
In this tutorial you learned how to:
- Setting up the WebService control
- Execute the WebService from a function
- Use a function to validate the returned data and alter various screen controls to indicate success or failure