Social Schedule
This automation screen is based on the webservice of Facebook, Twitter, Viber or Whatsapp which provide a callback URLs for their messaging platform. It allows you to grab incoming messages of chat accounts defined in Social Accounts and save them locally as text files in XML format.
|
Note: You can see and manage all the active project automations in the Schedule screen. |
To access Social Schedule, you should select the following menu options:


The screen will now appear on an editing tab.
The left-hand side of the screen is a list of all the currently defined social automations and the right-hand side of the screen contains the editing panel.
Actions
The following actions are available through the toolbar:
| Icon | Description |
|---|---|
|
|
Updates the contents of the screen. |
|
|
Adds a new social schedule by providing its settings. |
|
|
Allows you to modify the settings of a social schedule. |
|
|
Delete a selected social schedule from the list |
|
|
Save your changes |
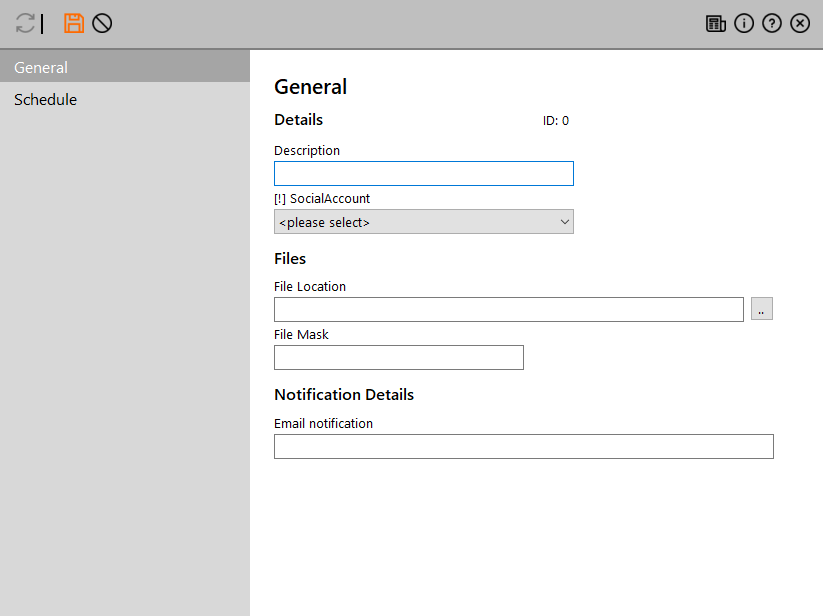
Settings
When creating or editing a social schedule, you can define the following settings:
- Description: It is simply used to find the alert in the list
- Social Account (drop-down list): The type of count having two options
- File Location: Click the ellipsis (...) to select a folder for saving the incoming messages to
- File Mask: A generic name to be used for the message files. It helps being related to the selected social account, e.g. 'faceboo*.xml' or 'viber*.xml'.
- Email notification: Set the list of email recipients of an email alert
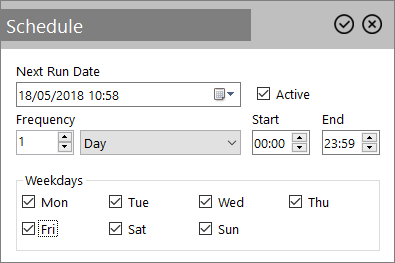
Scheduling
Once an automated job has been set-up, you will need to schedule it. This can be done by using the 'Schedule' tab.
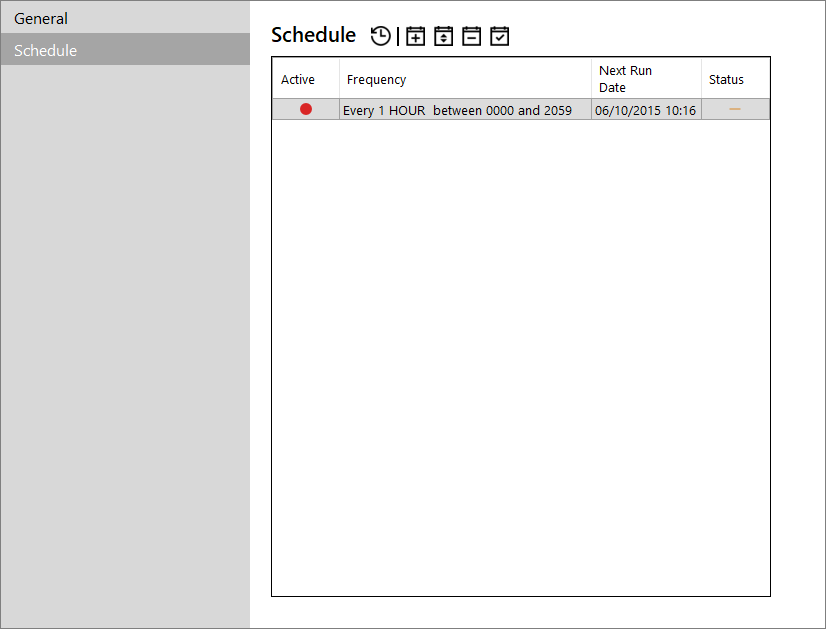
The list displays all the scheduled items for that service and you can use the toolbar icons to manage them.
| Icon | Description |
|---|---|
|
|
Adds a new scheduled item.
Click the |
|
|
Edits a selected scheduled item. Click the |
|
|
Removes a selected scheduled item from the system (with confirmation). |
|
|
In case of an error at the time of processing a scheduled item (for example, due to network or database connectivity issues) the status of the scheduled item may change to an Error status. In such a case, this button sets back the status to the Ready state. |
|
|
Refreshes the scheduled items' list |