Workflow
Workflow is the automated service (Infinity.WorkflowService) that can be used to run non UI scripts on a schedule. These scripts can contain standard commands or extended functions allowing you to create custom routines and modules. The creation of a workflow spans over 3 levels:
- Level 1: Described in this topic it specifies the workflow process and the schedule details
- Level 2: The Workflow Process groups the scripts created in workflow steps
- Level 3: The Workflow Step allows you to create a workflow script
To access Workflow, you should select the following menu options:


The left-hand side of the screen shows the available workflows and the right-hand side of the screen contains the settings and the schedule details.
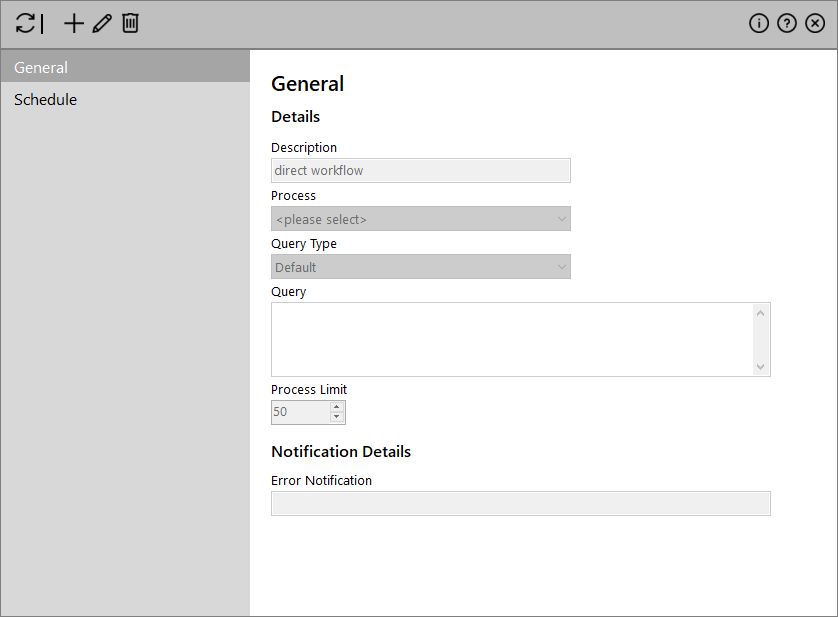
Settings
The following settings have to be specified for each workflow:
- Description: A descriptive name for the workflow
- Process (drop-down list): Select the Workflow Process
- Process Limit: The number of records to process before exiting
- Query Type (drop-down list): Specify how the process will get its data (Default, Overwrite, Table, Run Once)
- Query: If needed, it applies a condition for selecting records for the process
- Error Notification: Define different recipient(s) if there is an issue during the automation (SQL timeout, etc.)
Actions
The following actions are available through the toolbar on the top:
| Icon | Description |
|---|---|
|
|
Updates the contents of the screen |
|
|
Add a new Workflow by filling the required Settings. |
|
|
Modify the Settings of the selected Workflow. |
|
|
Removes the selected FTP Automation from the system (with confirmation). |
|
|
Commit your changes to the system. |
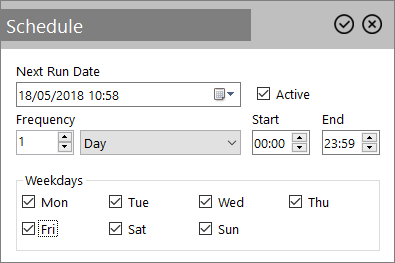
Scheduling
Once an automated job has been set-up, you will need to schedule it. This can be done by using the 'Schedule' tab.
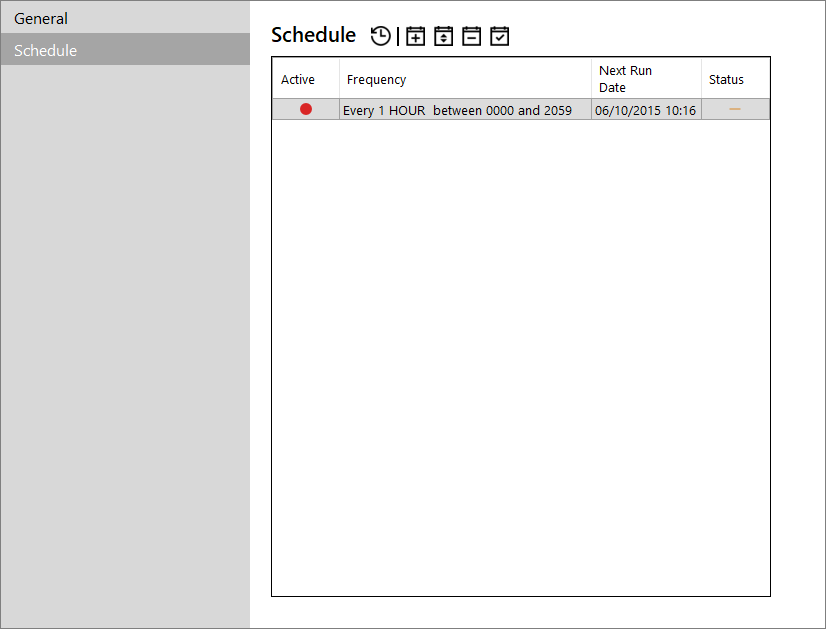
The list displays all the scheduled items for that service and you can use the toolbar icons to manage them.
| Icon | Description |
|---|---|
|
|
Adds a new scheduled item.
Click the |
|
|
Edits a selected scheduled item. Click the |
|
|
Removes a selected scheduled item from the system (with confirmation). |
|
|
In case of an error at the time of processing a scheduled item (for example, due to network or database connectivity issues) the status of the scheduled item may change to an Error status. In such a case, this button sets back the status to the Ready state. |
|
|
Refreshes the scheduled items' list |