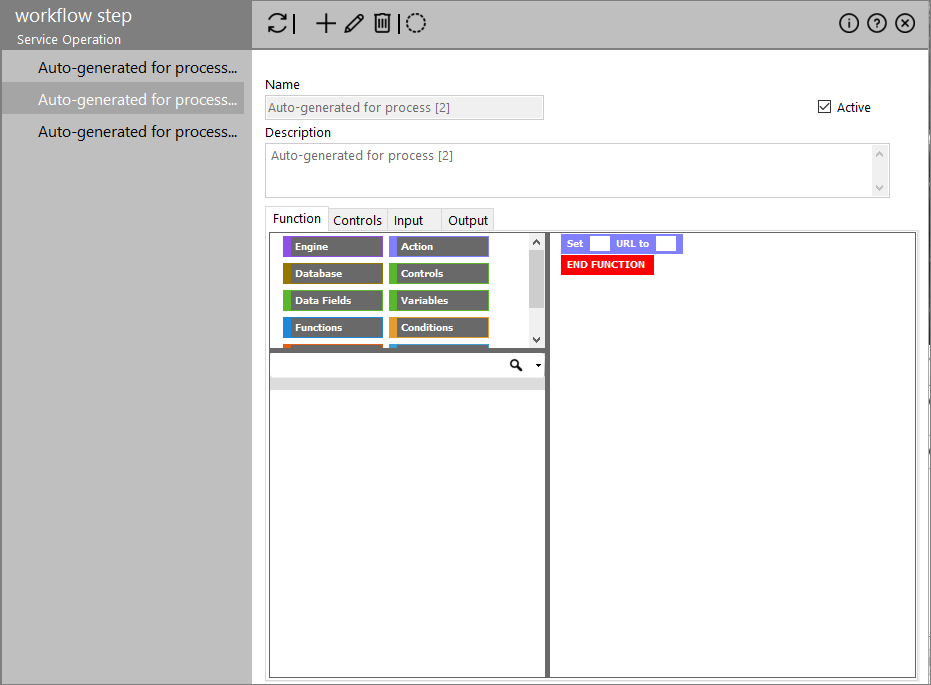
Workflow Step
In this screen you can create your scripts to be used in the Workflow Process screen. To access it, you should select the following menu options:


The left-hand side of the screen shows the available workflow steps processes (only the active ones if the Show Inactive checkbox is unchecked on the bottom). The right-hand side of the screen contains the steps' details and functions.
Actions
The following actions are available through the toolbar on the top:
| Icon | Description |
|---|---|
|
|
Updates the contents of the screen |
|
|
Add a new workflow step by filling its details. |
|
|
Modify the details of the selected workflow step. |
|
|
Removes the selected workflow step from the system (with confirmation). |
|
|
Commit your changes to the system |
|
|
Toggles the displaying of the inactive steps |
Details
Each workflow step has the following details:
- Name: The name of the workflow step
- Description: A descriptive text for the step
- Active (checkbox): Makes the step active
Function tabs
These tabs allow you to define your functions, controls and inputs/outputs for the workflow step.
In this tab you can build your workflow scripts using a cut-down version of the Function Builder.
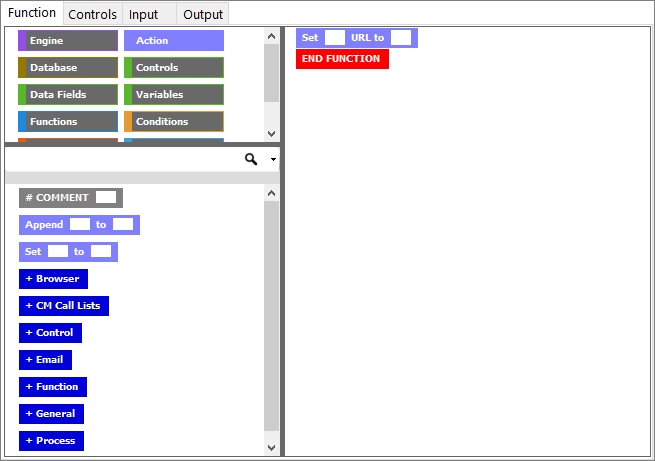
Clicking a command group on the top-left panel displays the available commands below. You can drag and drop the commands to the editing panel on the right to build your filter.
Important: The Data Fields command group does not contain any default commands. To populate the group you have to define one or more Project Filters in the Reporting tab of the project settings.
When you are done, click the ![]() icon on the toolbar to save your script to this step.
icon on the toolbar to save your script to this step.
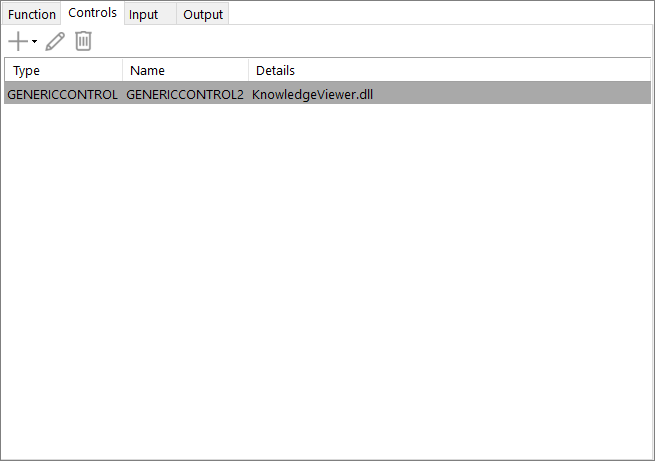
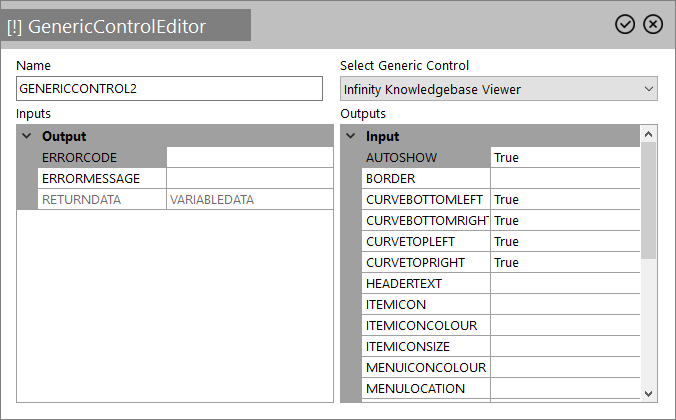
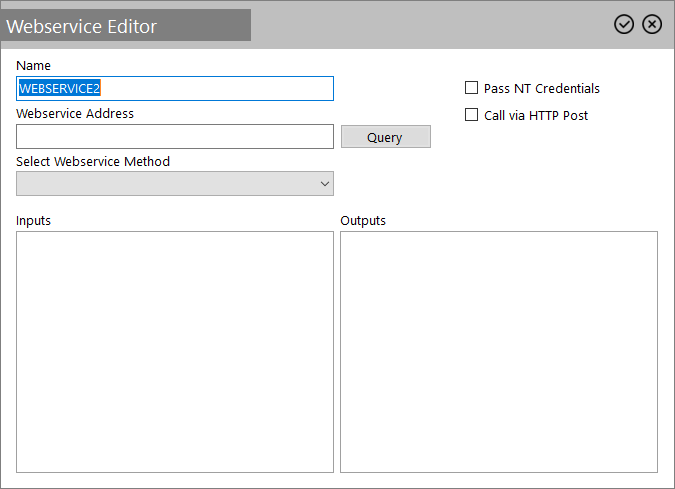
This tab allows you to define either a Generic Control or a Webservice that you can reference in the function (see Inbound Script - WebService for a related tutorial).
The following actions are available through the toolbar of the 'Controls' tab:
| Icon | Description |
|---|---|
|
|
Opens a drop-down list to select the Generic Control or Webservice that will be added. The Generic Control is used to show a custom .NET user control within the script.
You can provide a Name and open the Select Generic Control drop-down list to select one of the available Generic Controls (such as Infinity Diary Control or KnowledgeBase. The 'Inputs' and 'Outputs' panels will be updated with the selected control parameters. The Webservice control allows you to make use of either internal or external webservices.
You have to provide a Name and an Address, then click the Query button. This will attempt to connect to the webservice specified and identify the methods that can be called. Use the Select Webservice Method drop-down list to select one of those methods. The properties control will update to show the parameters you need to provide (input), and the response data that you will get back (output). Click the OK button to confirm and exit the dialog box. |
|
|
Modify the name and parameters of the selected Generic Control or Webservice. |
|
|
Removes the selected Generic Control or Webservice from the system. |
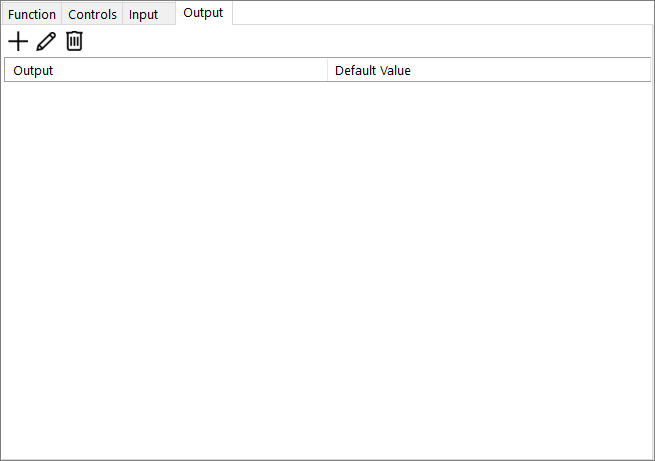
These two tabs allows you to specify input and output parameters.
The following actions are available through the toolbar of the 'Input/Output' tab:
| Icon | Description |
|---|---|
|
|
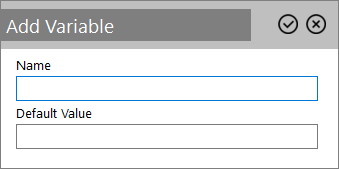
Add a new input/output by providing its Name and Default Value.
Click the OK button to add the new variable. |
|
|
Modify the parameters of the selected input/output. |
|
|
Removes the selected input/output from the system. |