You can amend the properties on a screen by clicking the Screen Properties button in the screen toolbar of the Screen Editor.

Each screen in your script has its own settings and each can be set independently of the others. The following information is displayed per section:
Here you can set the name of the screen, the background image and colour, whether or not it displays a border, and a comment (viewable on the Script Home screen and when outputting the script to a file). Some settings are self-explanatory but ones that merit further examination are discussed in the following paragraphs.
- Name: This setting allows you to set the name of the screen.
- Background Image: You may already have defined a watermark for the script (script-wide watermark), but may want a particular screen to show a different background image. Click the
 icon to access the Image Selector dialog box or click the
  icon to remove an already selected image.
 - Style: You can select a style, which will set a number of properties to the controls of the screen. Managing those styles is done via the Style Editor.
- Background Colour: This setting allows you to set the background colour of the screen.
-
Border (checkbox): Turns on and off a border around the edges of the screen
- Size: The dimensions of the screen in pixels. Select one of the predefined sizes or Other for providing a custom Width and Height
- Comment: Set any comments about the screen here to be displayed in the documentation outputs.

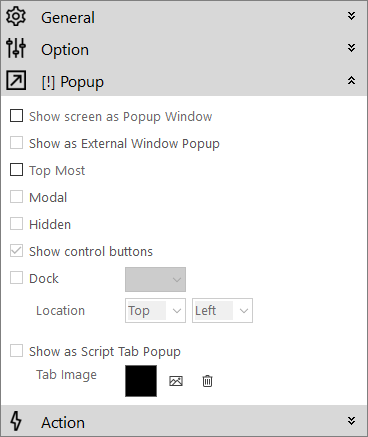
These options control how a screen is displayed to an agent. Screens can take many forms and these are discussed below.
- Show Watermark (checkbox): Displays the defined script watermark as the background of a pop-up screen. This option is disabled unless the 'Show Screen as Popup Window' checkbox is checked.
- Update Control Values (checkbox): Used to "remember" screen control values allowing user to navigate back/forward in the pop-up window script. This option is disabled unless the 'Show Screen as Popup Window' checkbox is checked.
- Process all commands (checkbox): Checking this option causes the pop-up window to run and process all functions within it, and will not raise any events or messages to the main script. This option is disabled unless the 'Show Screen as Popup Window' checkbox is checked.
- Display Effectives: When checked, this option allows any call outcome marked as an Effective to be shown if the Outcome dialog is called from this screen.
- Display Ineffectives: When checked, this option allows any call outcome marked as an Ineffective to be shown if the Outcome dialog is called from this screen.
- Allow Code Call: This option is used to indicate whether or not the agent is allowed to show the Outcome dialog whilst on this screen.
- Routing Colour: This option can be used to set the colour of the screen, when draw on the screen list or shown on the routing screen.
- Routing Order: This is used to indicate the position the screen will be shown on the Home screen.
- Start Screen Delay: This setting allows you to delay the running of the Start of Screen function by the specified number of seconds. This can be useful if you have a number of controls that are loading data from the database.
These options control how screens are displayed in the Script Home and Routing screens.
- Show screen as Popup Window (checkbox): When enabled, the screen will be opened in a new floating window within the current screen.
- Show as External Window Popup (checkbox): This option indicates the pop-up window will be opened in its own window, rather than shown as part of the main script. This option is disabled unless the 'Show Screen as Popup Window' checkbox is checked.
- Top Most (checkbox): Available only when ‘Show as External Window Popup’ is enabled, this option keeps the pop-up screen always on top of any other application running.
- Modal (checkbox): Available only when ‘Show as External Window Popup’ is enabled, this option sets the pop-up window as the top-most window which must be closed before the user will be able to continue processing the script. This is useful for making the agent acknowledge the message you are conveying.
- Hidden (checkbox): When checked, this setting will mean the pop-up window cannot be opened by the user from the pop-up menu option when running a script. You will be able to open a hidden pop-up window only by using actions in a function (this enables you to control when a pop-up screen is displayed). This option is disabled unless the 'Show Screen as Popup Window' checkbox is checked.
-
Show control buttons (checkbox): Available only when ‘Show as External Window Popup’ is enabled, this option allows you to show or hide the standard control buttons (Minimize, Maximize, and Close) that appear on Windows forms.
Important: If using a modal form and you hide the control buttons then you must provide a way for the agent to close the form using commands in a function.
- Dock (checkbox): This allows you to dock the pop-up window along one of the 4 edges of the screen – top, bottom, left or right. This option is disabled unless the 'Show Screen as Popup Window' checkbox is checked.
- Location: This option allows you to specify where the pop-up will be opened. There are a number of pre-set options; top, middle, bottom, left, centre, right. You can also type in a set of co-ordinates to specify an exact location on the script screen.
- Show as Script Tab Popup (checkbox): Shows the pop-up as a selectable menu option in the navigation toolbar when the script is running. You are then required to select the 'Home'
 icon on the Script Toolbar to return to the main script. This option is disabled unless the 'Show Screen as Popup Window' checkbox is checked.
 -
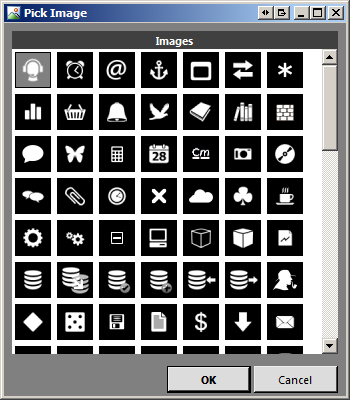
Tab Image: The Tab Image option allows you to specify the icon to be used for the tab, or in the pop-up window titlebar, by clicking on the
icon, this will open the icon picker.
Once you have selected the icon you want to use click the OK button. To reset to the default icon click the
icon.
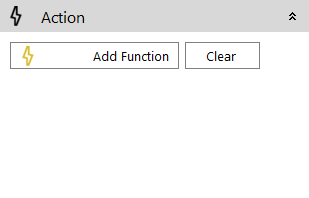
Clicking Add Function button allows you to define a function to run when the screen's Events are triggered.