Importing & Exporting
Importing
By importing files, such as images, you can used them in reports to customise and brand the output. To import files, click the Import  icon on the menu bar.
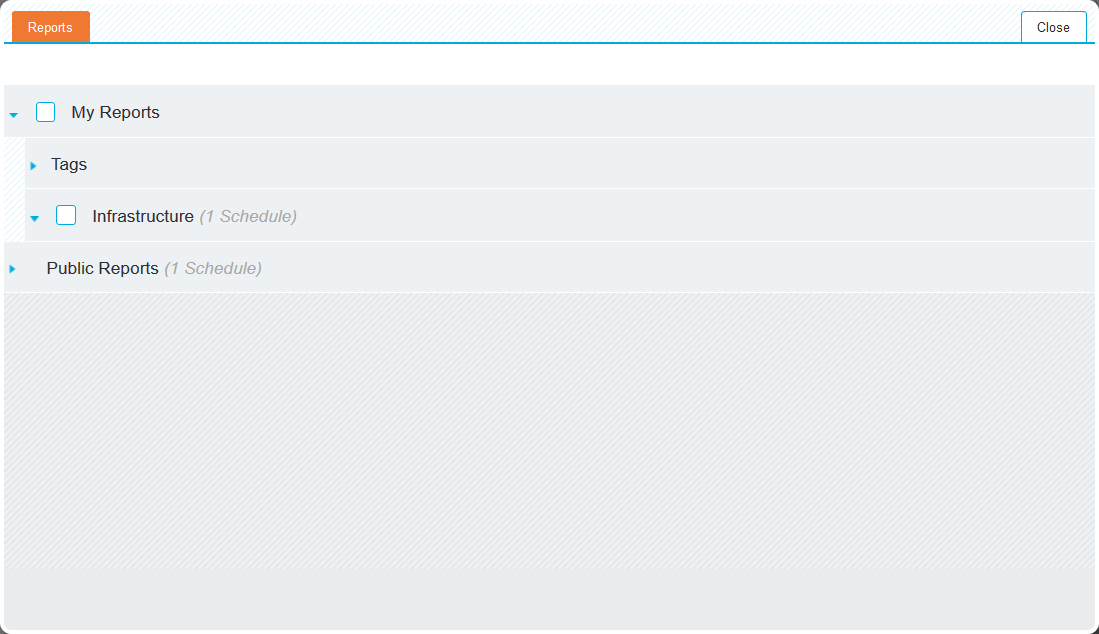
Select a destination folder by clicking its checkbox and click the Browse... button to select a file.
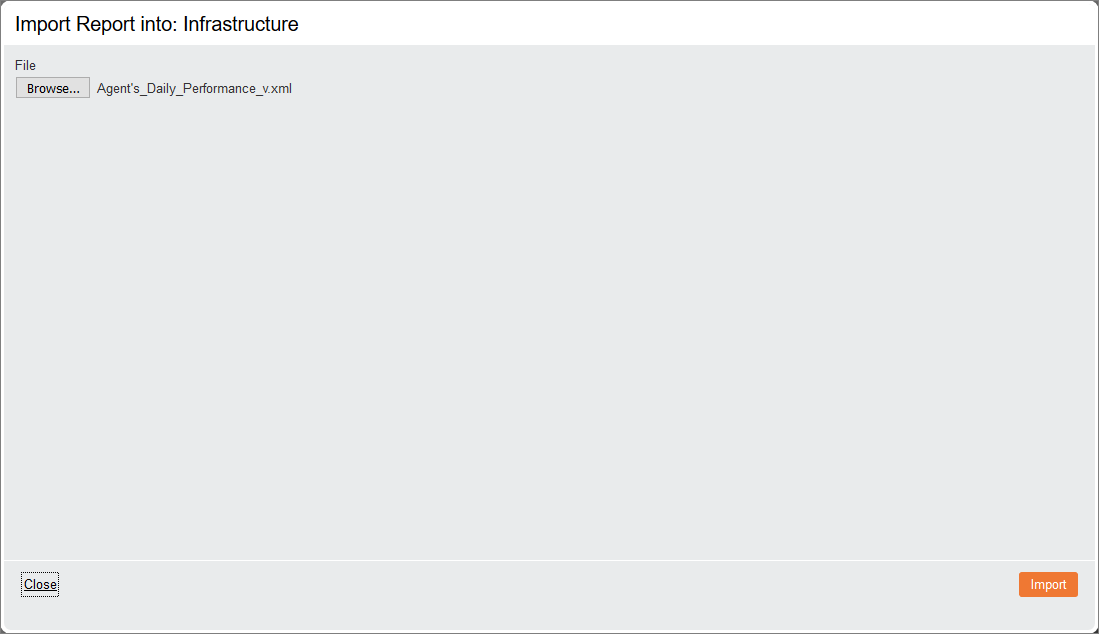
Click Import to complete the process, or Close to cancel.
The imported file can now be added to a Pages or Flow report using the Embed External Entity Report Component.
Exporting
Exporting allows you to export a copy of a report or the results of a query. To export , click the Export  icon on the menu bar.
You can define the following parameters :
-
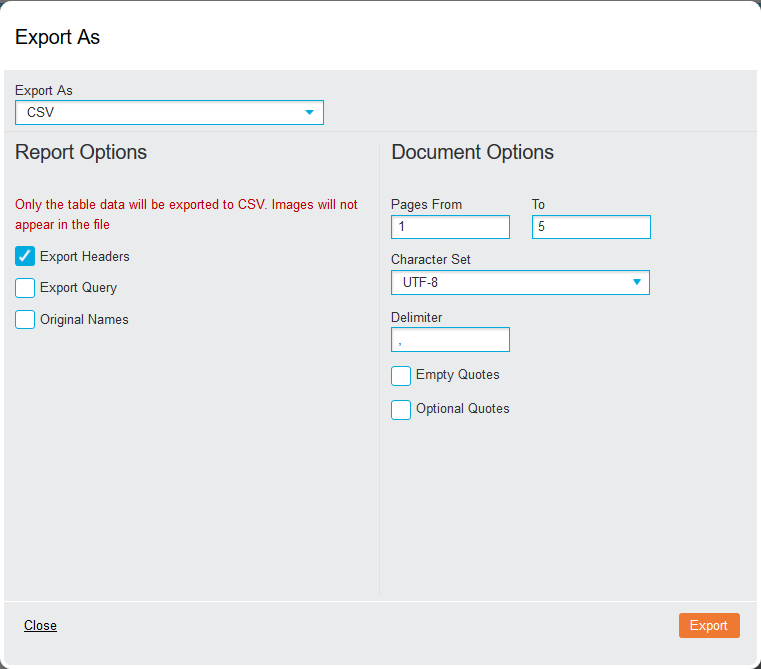
Export As (drop-down list): Select the required file type, revealing the relevant Report Options and Document Options:
 CSV exports the report as a .CSV file. This function is only available for Queries and Crosstabs. Excel exports the report as an Excel file. This function is only available for Queries, Crosstabs and Dashboards that do not contain images. HTML exports the report as a .zip file coded in HTML. Image PDF exports the report as a .PDF document. Apple-only fonts and the Impact font are not supported. XML exports the report as an .XML file. This function is only available for Queries.
When exporting to a database, the database instance must be running on the same server as Analytics. This functionality is configured by the system administrator.
Report Options
- Hide Page Numbers (checkbox): When enabled and exporting to PDF, page numbers will not be displayed.
- Export Headers (checkbox): Toggle whether row and column headers are exported with the report
- Export Query (checkbox): Toggle the display of a line of text to the bottom of the report showing the search criteria used to filter the data. Although the search bar is hidden in Viewer, values used to filter the data may be needed to provide context.
- Time Stamp (checkbox): Enable this to add the export date and time to the bottom of the exported file
- Automatically Size Columns in Excel Reports (checkbox): Enable this to resize columns to fit the contained entries. If this option is disabled, cell contents will be wrapped to account for multiple lines.
- Original Names (checkbox): Enable this to export using the original field names as displayed in the source data.
- Omitted Fields (drop-down list): Select individual fields to omit or use the All button to select all fields. Click None to clear any selected fields.
- Masked Fields (drop-down list): Select individual fields to mask or use the All button to select all fields. Click None to clear any selected fields.
- Scale (drop-down list): If exporting to PDF, use this to customise how the report will be sized on the output pages. Select a percentage to scale to an exact size, or select Fit to Page to scale to the selected Page Size.
-
Duplicate Pages For Crosstabs/Queries (checkbox): When enabled and exporting to PDF, if a page contains a Crosstab or Query with multiple pages the entire page will be duplicated for each page of the Crosstab or Query.
Document Options
- Pages From/To: Specify a page range
- Character Set (drop-down list): Select the required character set
- Delimiter: Specify the boundary between separate, independent regions in plain text
- Empty Quotes (checkbox): Enable this option to add quotes to an empty field
- Optional Quotes (checkbox): Enable this to add quotes around strings if they contain a space
- Ignore Groups and Hirerachies
- Fields (drop-down list): Select the fields to be exported. Click All to select them all at once or None to deselect them.
- Page Size (drop-down list): When exporting to PDF, select the exact output size
- Orientation: When exporting to PDF, select between Portrait and Landscape using the relevant radio buttons.