Infinity Skills are collections of settings that define how campaigns within Infinity operate. Skills also determine which projects an agent can “see” and work on. You can a select a skill through the Select Skill screen of Contact Manager.
To access the Skills editor, select the following menu options:


The Skills editor will now appear on an editing tab. The list on the left displays the available skills to the project; only the active ones if the toolbar icon ![]() is disabled.
is disabled.
Actions
The following skill actions are available through the toolbar on the top of the right panel:
| Icon | Description |
|---|---|
|
|
Updates the list of skills |
|
|
Adds a new skill by providing the required settings in Tabs |
|
|
Edit the in Tabs of the selected skill |
|
|
Removes the selected skill (with confirmation) |
|
|
Save your skill changes |
|
|
Toggles displaying the inactive skills |
Parameters
The following parameters exist for a skill:
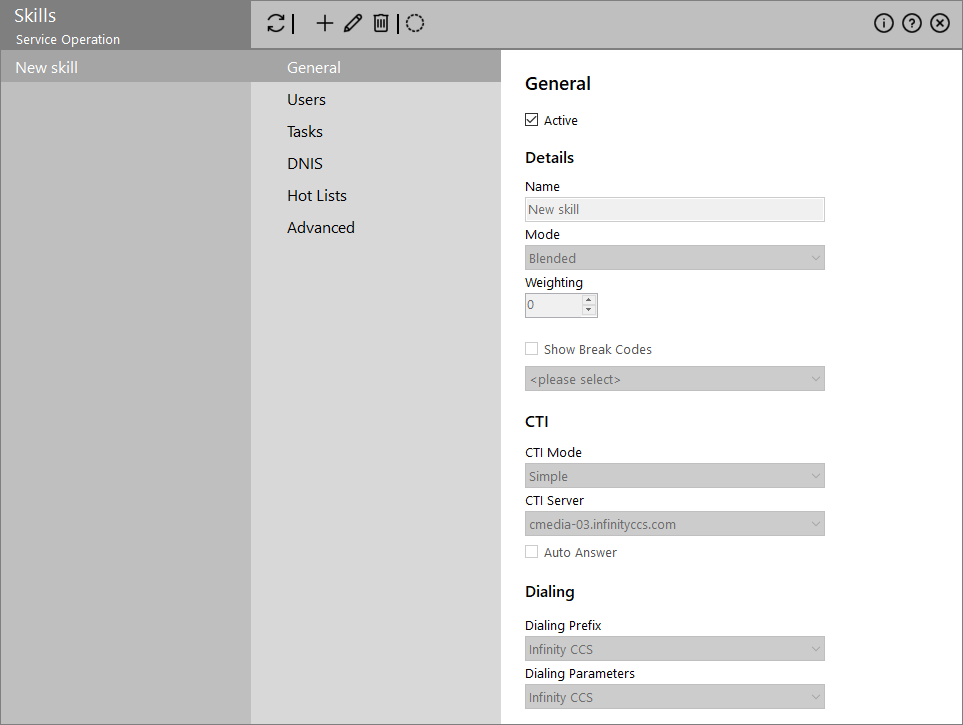
- Active (checkbox): Whether the skill will be active or not.
- Name: A descriptive name of this skill. It will be displayed to agents so it should clearly signify what campaign the user will be running should they select it.
- Mode: It specifies the direction of calls for this campaign. The options are Inbound, Outbound and Blended (mixture of both).
- Show Break Codes (checkbox): Whether or not are available for agents for selection.
- Show Break Codes (drop-down list): Which set of Break Codes the agents can see (available only if the checkbox is selected).
- Weighting: The amount of calls selected from each skill if the agent is assigned to more than one skill. However, if the user logs into the skill that has a zero weighting, then no weighting will occur.
- AutoAnswer (checkbox): Whether or not calls are automatically answered.
- CTI Mode: Determines how much control is ceded to the CTI Server over certain processes. Selecting Simple gives less control to the CTI Server and Complex gives more.
- CTI Server: The CTI server settings to be used by this skill.
- Dialling Prefix: The required Dialling Prefix (if any).
- Dialling Parameters: The required Dialling Parameter.
Tabs
The tabs section in the bottom half of the screen is where you can assign various elements to the skill:
It allows you to assign/ remove users to/ from the skill.
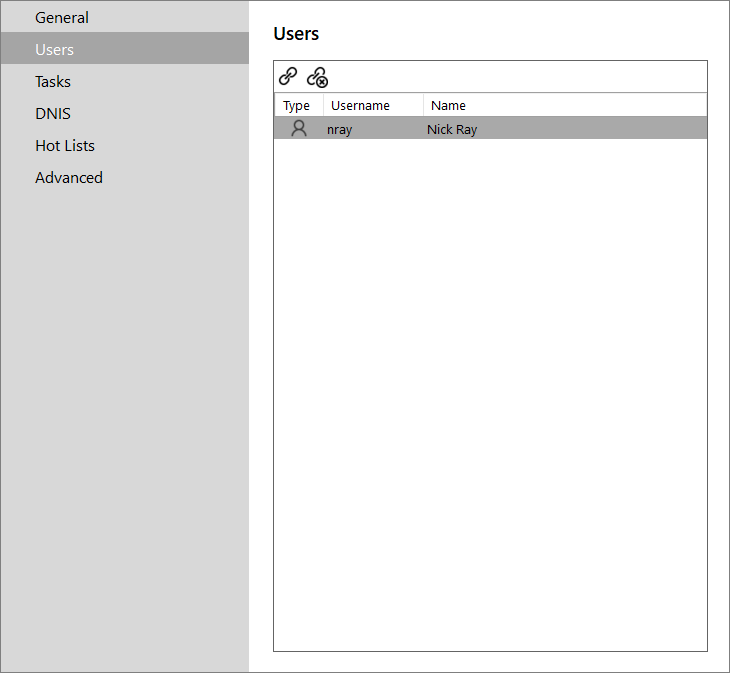
Clicking the ![]() icon on the tab's toolbar opens the 'Select User' pop-up window.
icon on the tab's toolbar opens the 'Select User' pop-up window.
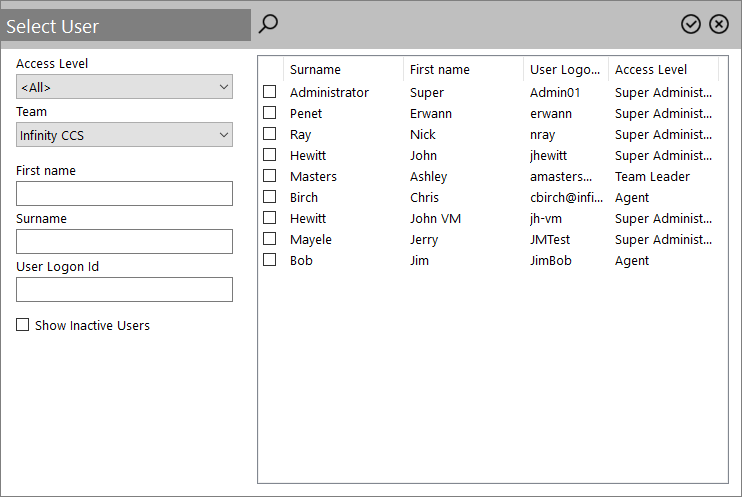
- Select an Access Level and a (reporting) Team
- Provide any search text in First Name, Surname and User Logon Id fields (optional)
- Tick the Show Inactive Users checkbox if you want to display them in the results
- Click the
 icon
icon - Select one or more users on the search results by clicking anywhere in the rows
- Click the
 icon
icon
Select a user and click the ![]() icon to remove him from the skill.
icon to remove him from the skill.
It allows you to assign/ remove tasks to/ from a skill.
The following actions are available through the tab's toolbar:
| Icon | Description |
|---|---|
|
|
Open the 'Add Task' pop-up window and provide the following parameters:
Then click the |
|
|
Modify the task's parameters and then click the |
|
|
Remove the selected task from the skill. |

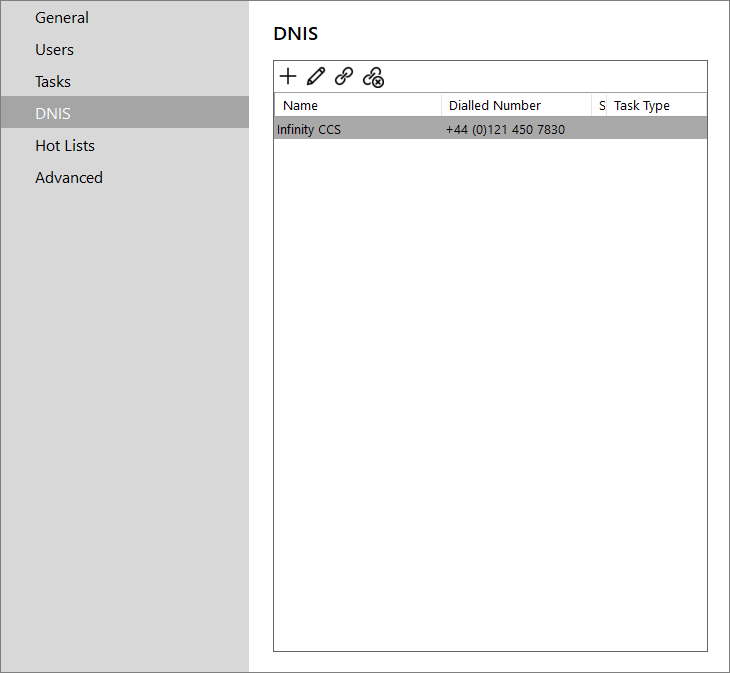
In this tab you can set up a DNIS entry to identify and route incoming calls to the skill.
The following actions are available through the tab's toolbar:
| Icon | Description |
|---|---|
|
|
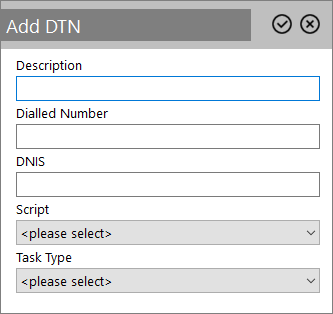
Add a new DNIS entry and map it to the skill. Note: This is equivalent of adding a new DNIS entry on the DNIS screen.
On the 'Add DTN' pop-up window provide the following parameters:
Clicking the |
|
|
Modify the DNIS Script or Task Type and then click the |
|
|
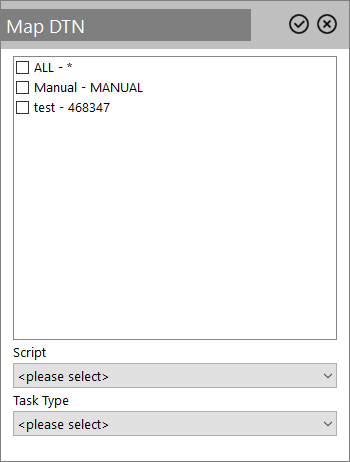
Map an existing DNIS to the current skill.
Check the DNIS on the list, select a Script and Task Type and then click the |
|
|
Removes the selected DNIS from the skill (with confirmation). |
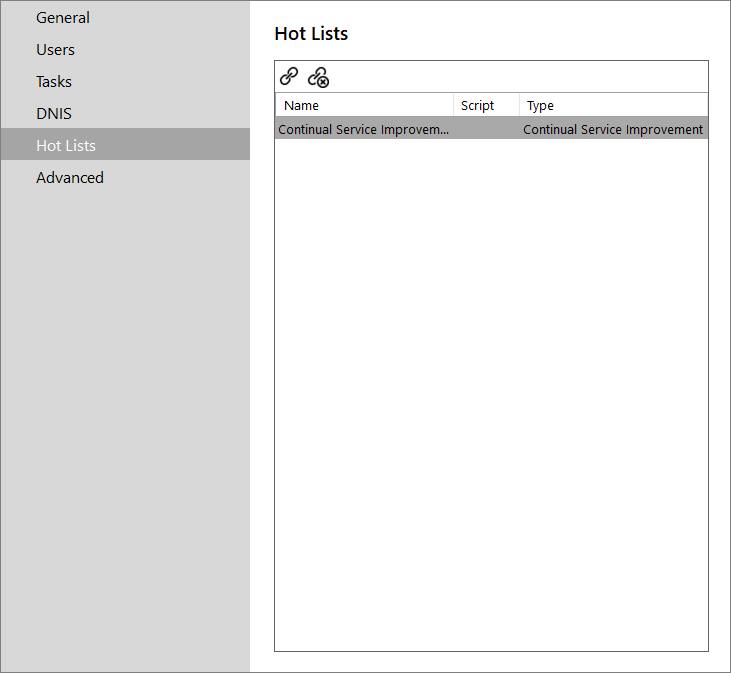
In this tab you can manage the Hot Lists that can be "seen" by the skill.
The following actions are available through the tab's toolbar:
| Icon | Description |
|---|---|
|
|
Map a hot list to the current skill.
Check the hot list on the list and click ththe |
|
|
Removes the selected hot list from the skill (with confirmation). |
The following custom settings exist in this tab:
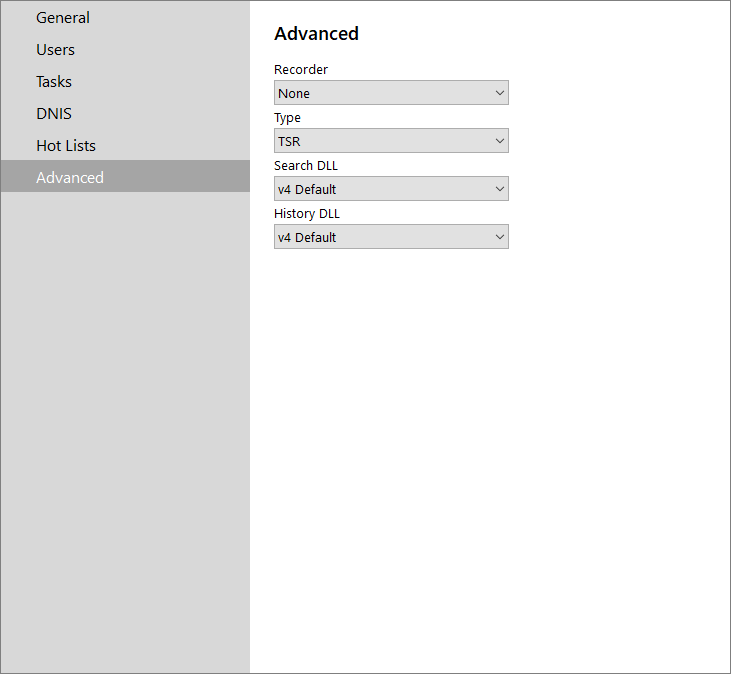
- Recorder: Defines the recorder DLL to be used by the skill (if any)
- Type: This is a special "Back Office" type, which means that toolbar event will be ignored
- Search DLL: Allows you to specify a custom DLL to be shown for the search panel in the script. Custom DLLs can be defined at the Plugins screen.
- History DLL: Allows you to specify a custom DLL to be shown for the history panel in the script. Custom DLLs can be defined at the Plugins screen.